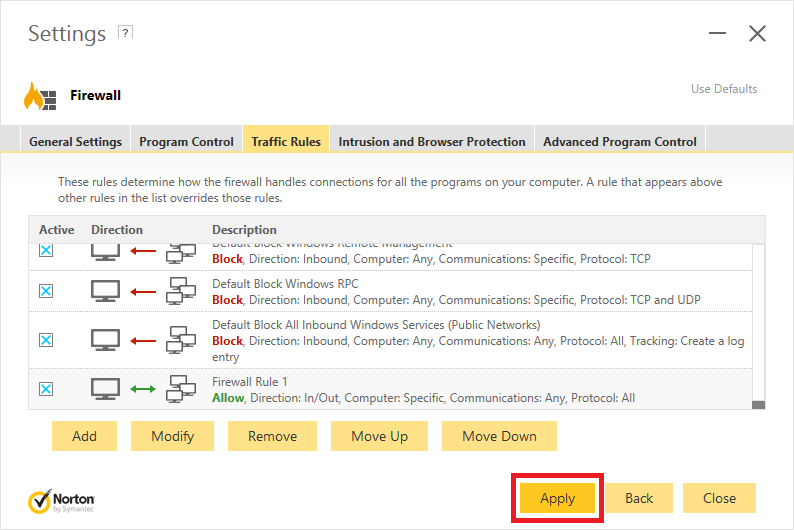
The default Norton settings should allow you to install and launch ProRealTime without any issues.
If however your have chosen elevated security settings, it may be necessary to add exceptions in order to authorise ProRealTime.
Note that depending on the type of Norton license that you use, the user interface may be different that the one shown below.
If it is the case or if you have any issues, please contact the Norton customer support.
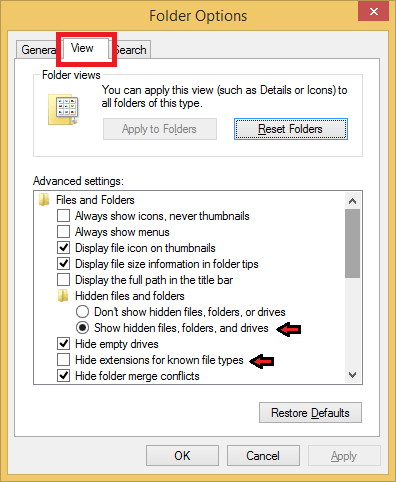
- Open a Windows Explorer window.
- From the “View” ribbon at the top, click on “Options”
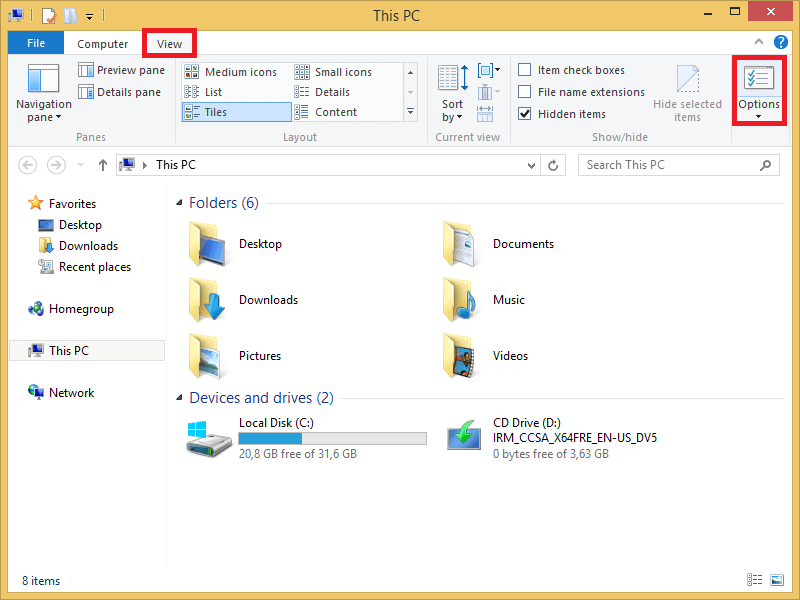
- Open the tab “View”
- Check the option “Show hidden files, folders, and drives”
- Un-check the option “Hide extensions for known file types”
- Click on “OK” to validate and close the window
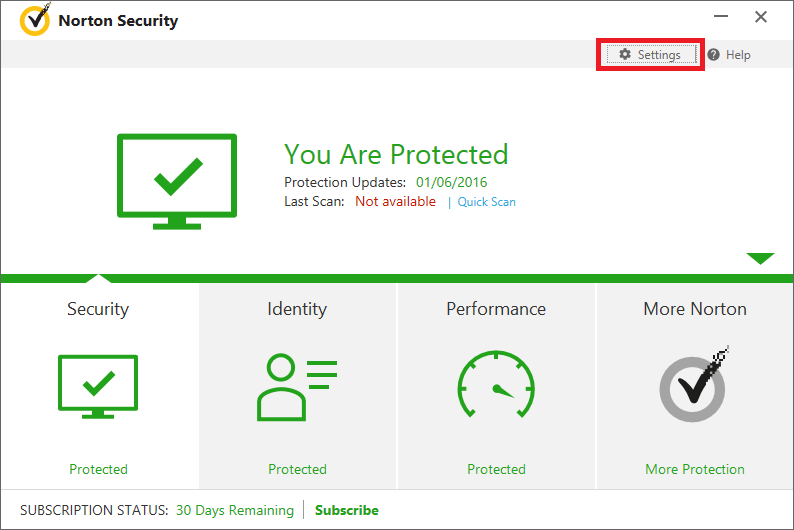
- Open the Norton Window and click on “Settings”
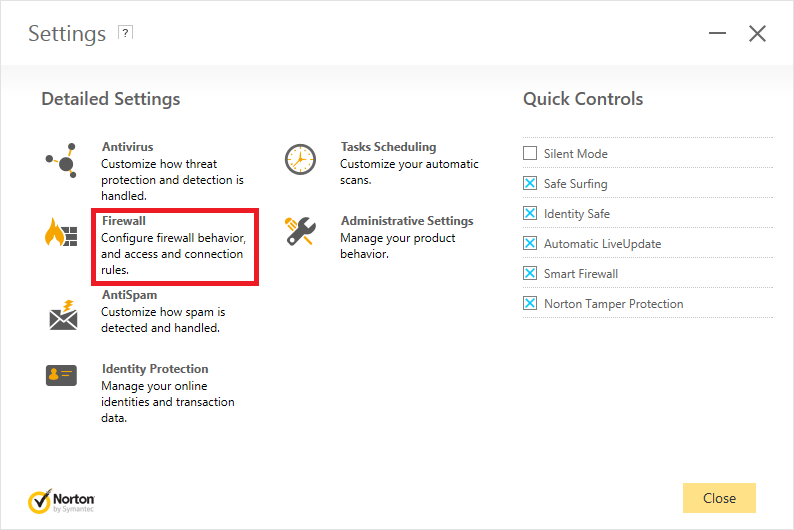
- Open the “Firewall” section
The following applies if you managed to install ProRealTime but the program does not launch.
If you were unable to install ProRealTime or if you have launching issues, jump to Step 2 directly and then re-install ProRealTime.
Step 1
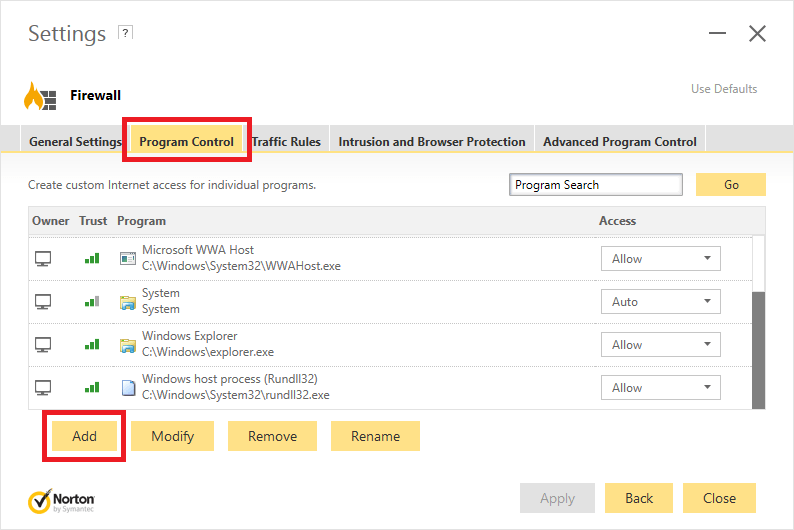
- Click on the “Program Control” tab and then click on “Add”
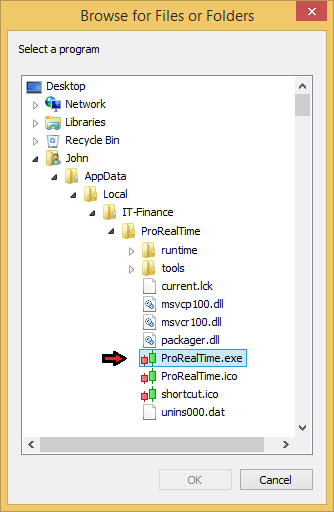
- Browse to select the ProRealTime installation folder at the following location – C:\Users\YOUR-WINDOWS-USERNAME\AppData\Local\IT-Finance\
- Open the sub-folder of the version of ProRealTime you are using (either “ProRealTime” or “ProRealTimeTrading” or “IGProRealTime”).
- Select the “.exe” file (either “ProRealTime.exe” or “ProRealTimeTrading.exe” or “IGProRealTime.exe”) and click on “OK”
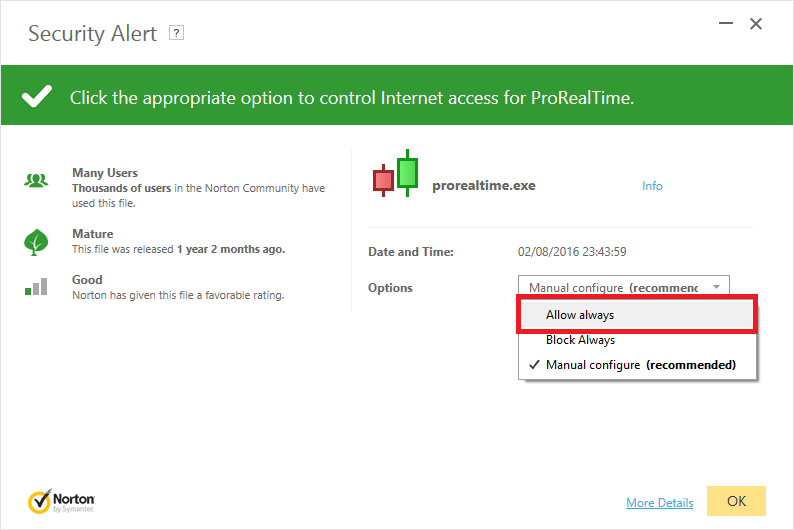
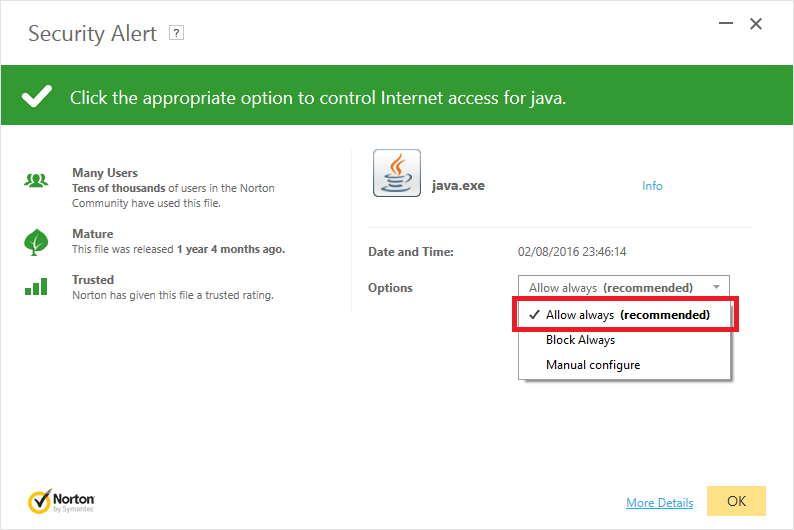
- From the window that appears, select the option to “Allow always” and then click “OK”.
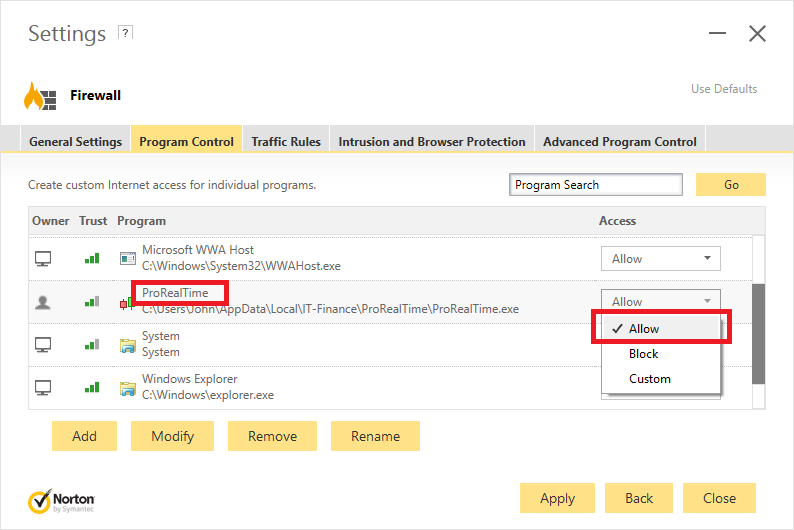
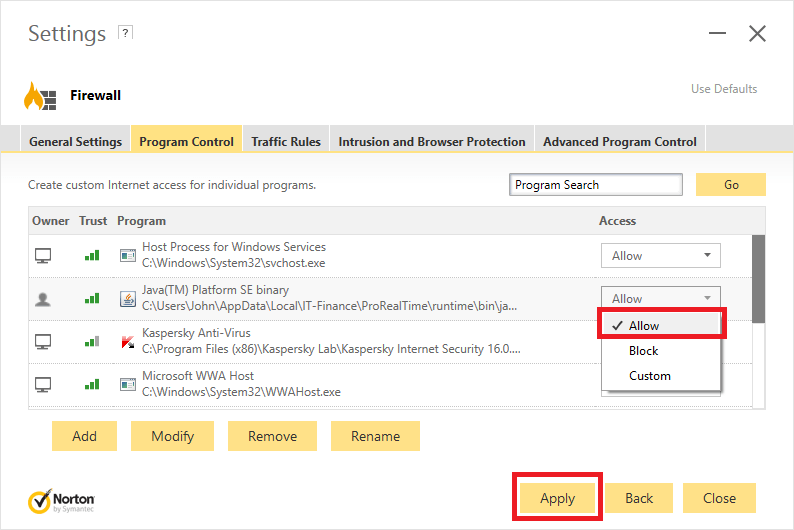
- ProRealTime is now added to the list. Click on the dropdown menu in the “Access” column to make sure it is set on “Allow” for the ProRealTime line.
- From the same window, click again on “Add”
- Browse to select the ProRealTime installation folder at the following location – C:\Users\YOUR-WINDOWS-USERNAME\AppData\Local\IT-Finance\
- Open the sub-folder of the version of ProRealTime you are using (either “ProRealTime” or “ProRealTimeTrading” or “IGProRealTime”).
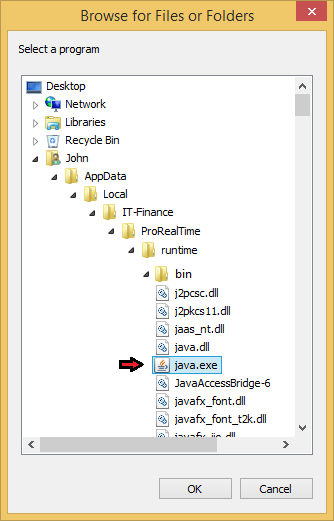
- Open the “runtime” folder, then the “bin” folder
- Select the “java.exe” file and click on “OK”
- From the window that appears, select the option to “Allow always” and then click “OK”.
- The Java included with ProRealTime is now added to the list. Click on the dropdown menu in the “Access” column to make sure it is set on “Allow” for the Java line.
- Click on “Apply”
You should now be able to Launch ProRealTime.
If it is not the case, proceed to Step 2 below.
Step 2
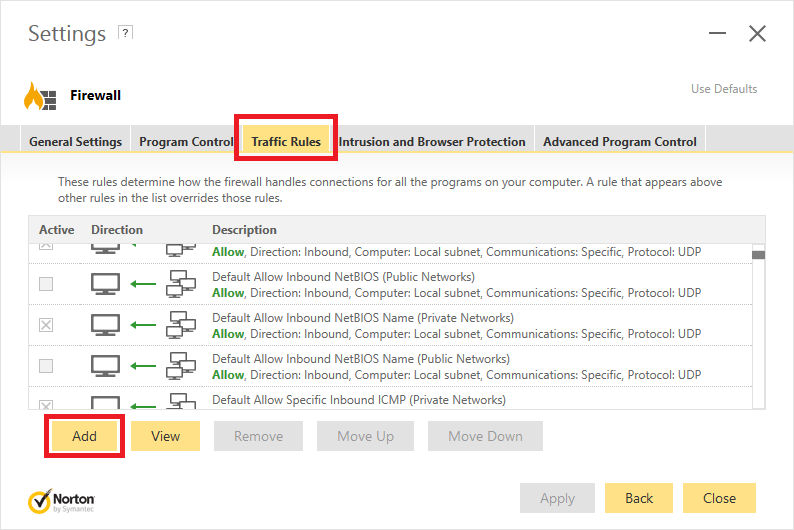
- Click on “Traffic Rules” then click on “Add”
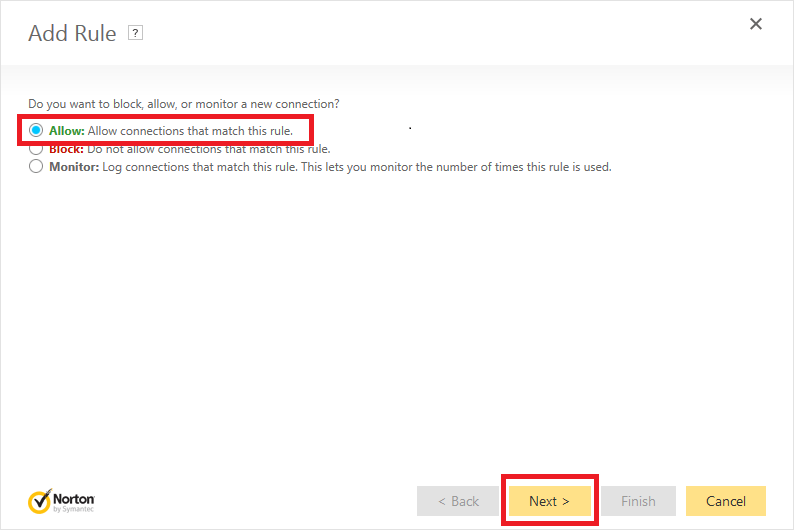
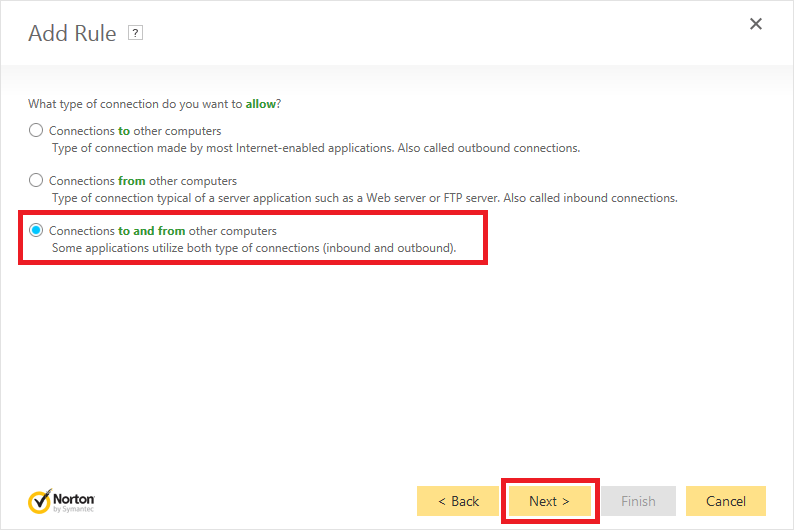
- Choose “Allow” then “Next”
- Choose the “to and from” option then “Next”
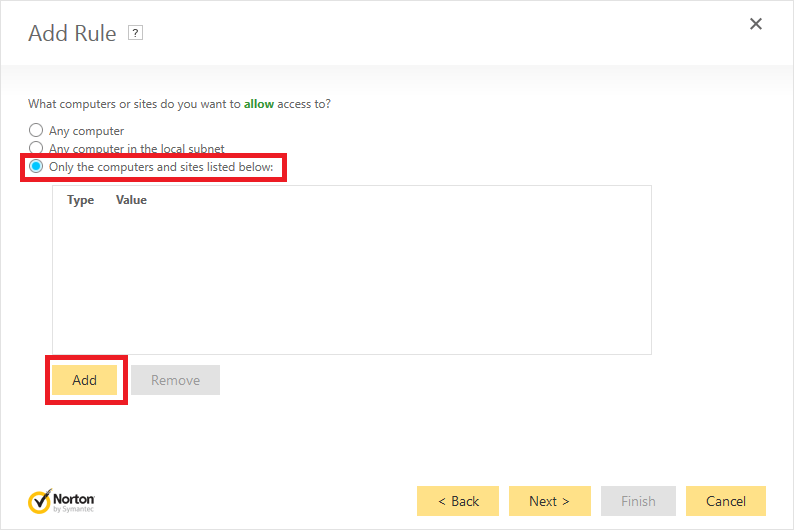
- Choose “Only the computers and sites listed below” and click on “Add”
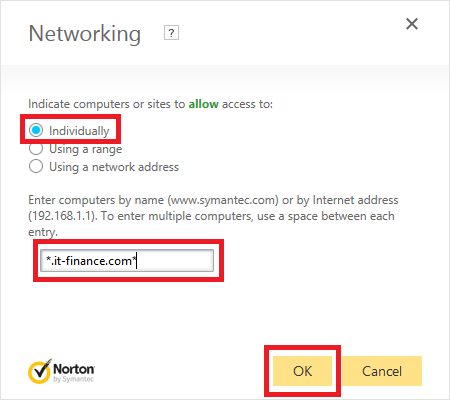
- Choose “Individually” and then enter the internet address: *.it-finance.com*
- Click on OK
- Do this a second time for the internet address: *.prorealtime.com*
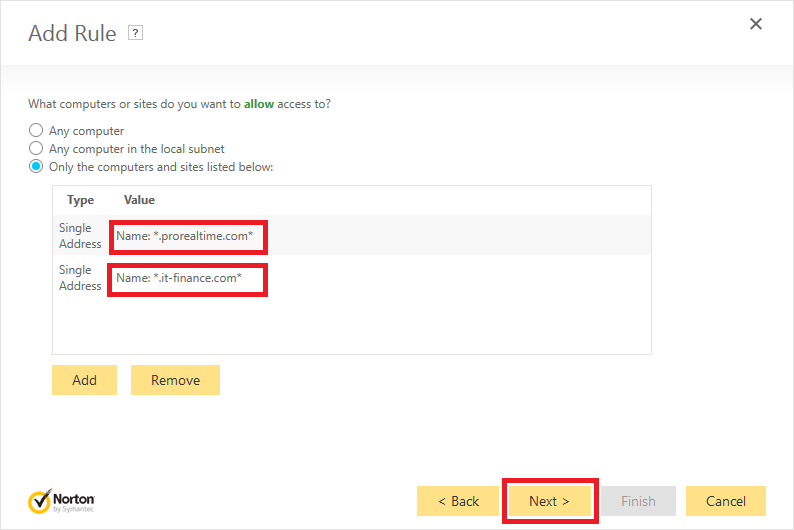
- Once you see the 2 internet addresses, click on “Next”
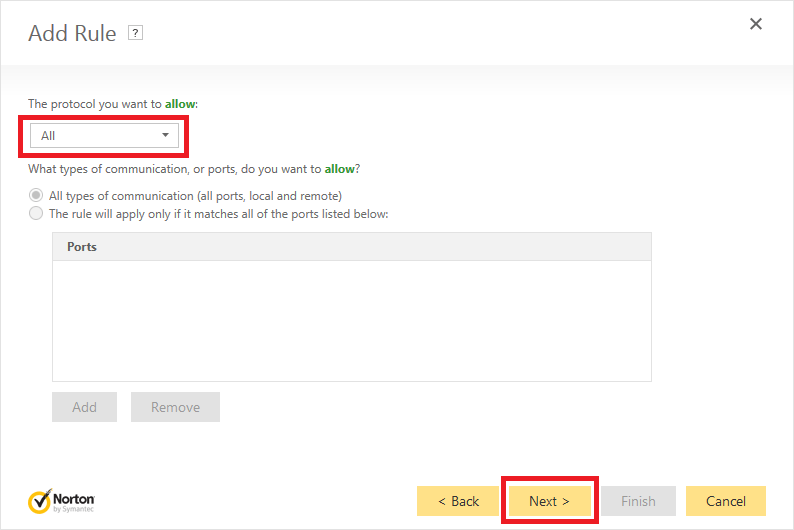
- Make sur “All” is select and then click “Next”
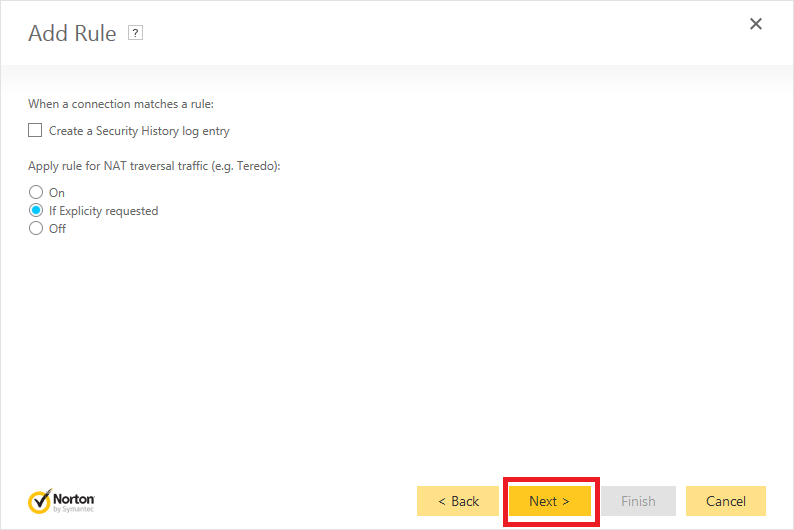
- Click “Next”
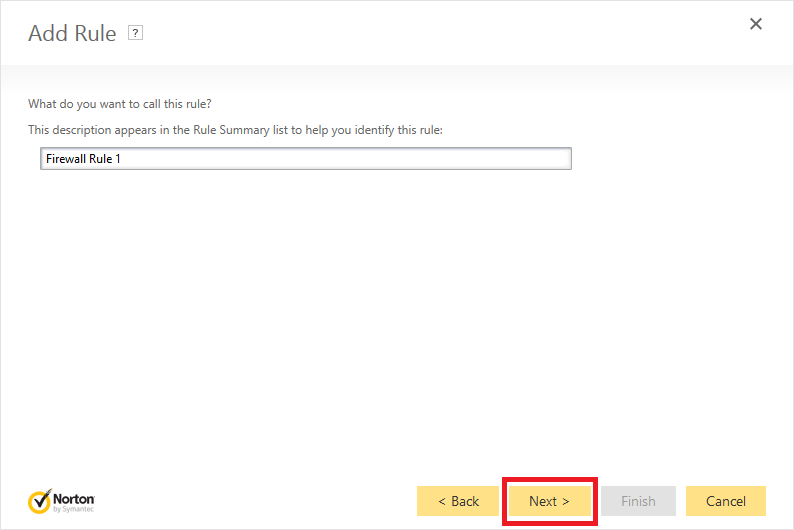
- Optionally, you can name the firewall rule you are creating
- Click on “Next”
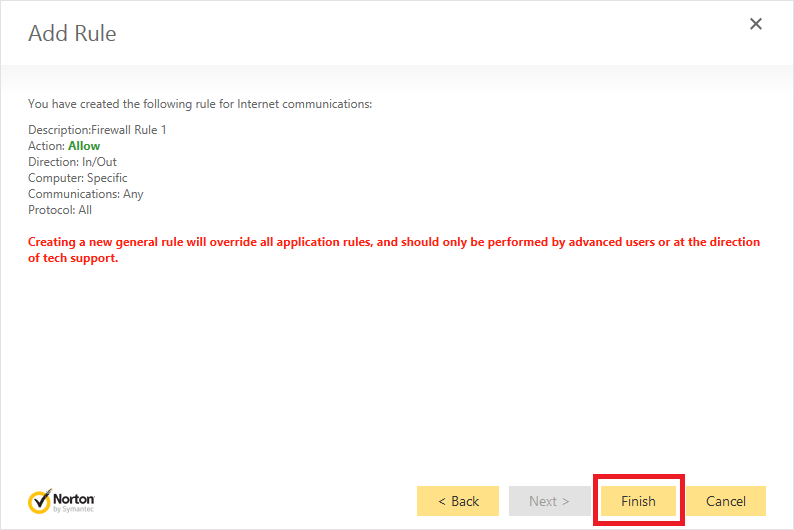
- Click on Finish.
- Click on “Apply”
You’re done!
